
Know Your Water Heater and Sump Pump
As a homeowner, there are two distinct plumbing failures that can instantly ruin your day. The first is stepping into what should be a relaxing morning shower, only to be hit with an icy blast of cold water. The second is walking down the stairs to your basement after a heavy spring rain, only to hear the squelch of water seeping into your socks.
Both of these nightmares—a failed water heater and a failed sump pump—are entirely preventable. Yet, because these appliances live in dark utility rooms or hidden pits, they are out of sight and out of mind until they break down completely.
Understanding the lifespans of your home’s most critical plumbing appliances, and performing the simple, routine maintenance they require, is the difference between a minor weekend chore and a massive, multi-thousand-dollar emergency repair. In this comprehensive guide, we will break down exactly how long should a hot water heater last, the signs that it is time for a replacement, the critical steps for water heater maintenance, and the often-overlooked necessity of sump pump maintenance.
The Heart of Your Home’s Comfort: The Traditional Hot Water Tank
In Canada, the vast majority of homes still rely on traditional, tank-style water heaters. These cylindrical giants constantly heat and store anywhere from 40 to 60 gallons of water, ensuring it is ready the moment you turn on a faucet. But because they are constantly under pressure and exposed to heat and municipal water chemicals, they have a very finite lifespan.
What is the Average Lifespan of a Hot Water Tank?
When homeowners move into a new house or notice their system is looking a little rusty, one of the first questions they ask is: hot water tank last how long?
The average lifespan of a hot water tank is typically between 8 and 12 years.
While some high-quality models might stretch to 15 years in ideal conditions, passing the decade mark means you are officially on borrowed time. The exact water heater life expectancy in your specific home depends heavily on a few key factors:
- Water Quality: Hard water—which is common in many parts of the country—contains high levels of calcium and magnesium. These minerals precipitate out of the water when heated and settle at the bottom of the tank as a thick, concrete-like scale. This scale acts as an insulator, forcing the burner to work twice as hard to heat the water, dramatically shortening the unit’s life.
- Usage Volume: A family of six running the dishwasher, washing machine, and multiple showers daily will wear out a tank much faster than a single person living in a condo.
- Maintenance History: A tank that receives annual maintenance will almost always outlast one that has been ignored since installation.
How Often to Replace Hot Water Tank Systems
Knowing how often to replace hot water tank units requires paying attention to the warning signs. You shouldn’t wait for the tank to burst and flood your utility room. You should plan for a proactive replacement when you notice the following red flags:
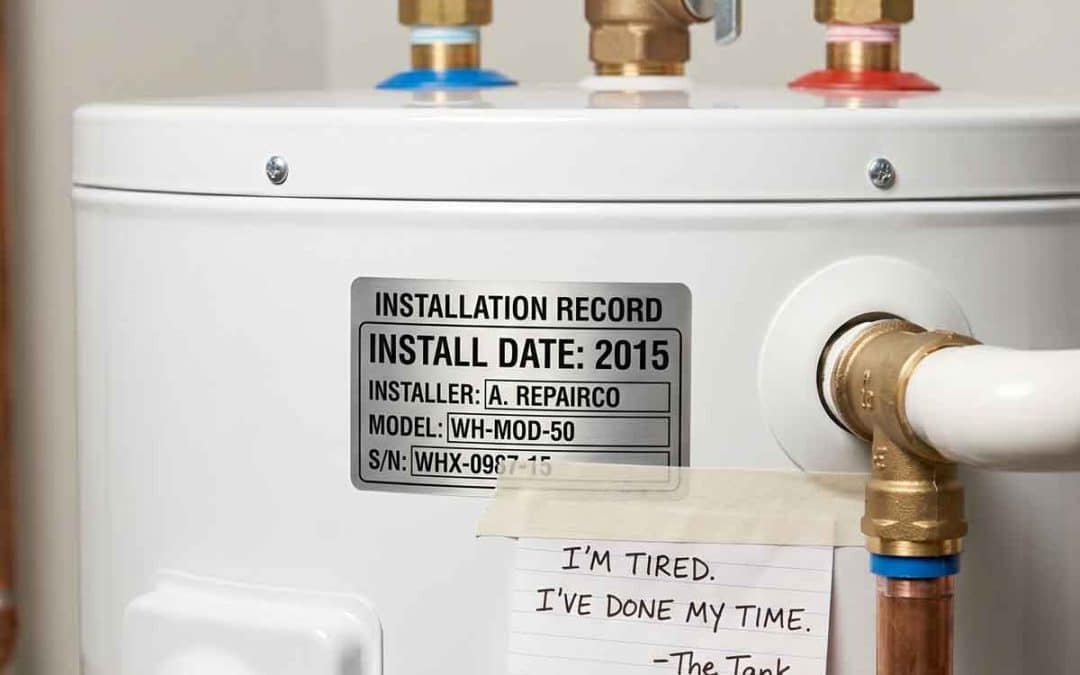
- The Age Rule: Check the manufacturer’s sticker on the side of the tank. The first few digits of the serial number usually indicate the month and year of manufacture. If the tank is over 10 years old, start budgeting for a replacement.
- Rusty Water: If hot water comes out of your taps looking slightly brown or orange, the inside of your steel tank is rusting away. (Note: If both cold and hot water are rusty, the issue is likely your home’s galvanized steel piping, not just the heater).
- Rumbling or Popping Noises: As hard water scale builds up at the bottom of the tank, water gets trapped underneath it. When the burner turns on, that trapped water boils and bubbles up through the sediment, creating a popping or rumbling sound.
- Moisture Around the Base: If you see a puddle forming around the bottom of the tank, the structural integrity of the steel has likely failed. A slow leak will rapidly turn into a catastrophic rupture.

Having a plumber check and replace your anode rod every 3 to 5 years can effectively double your water heater life expectancy.
Extending the Clock: Traditional Hot Water Tank Maintenance
If your tank is still relatively new, you can significantly extend its life through proper hot water tank maintenance. There are two critical tasks that should be performed annually.
1. Flushing the Sediment
To prevent the damaging buildup of hard water scale, the tank must be flushed.
- Turn off the power or gas supply to the unit.
- Connect a standard garden hose to the drain valve at the bottom of the tank.
- Run the other end of the hose to a floor drain or outside.
- Open the pressure relief valve at the top of the tank, then open the drain valve.
- Let the water run until it flows completely clear, with no sandy sediment visible.
2. Checking the Anode Rod
This is the most crucial, yet least understood, part of water heater maintenance. Every tank contains a sacrificial anode rod—a long piece of magnesium or aluminum suspended inside the tank. Due to a process called galvanic corrosion, the corrosive elements in the water will attack this softer metal rod instead of attacking the steel walls of your tank.
Once the anode rod is completely eaten away, the water will immediately start rusting your tank. Having a plumber check and replace your anode rod every 3 to 5 years can effectively double your water heater life expectancy.
While flushing the tank is a manageable DIY project for handy homeowners, checking the anode rod often requires heavy-duty tools to break the seal. For this reason, many people opt for professional servicing water heater appointments to ensure the entire system—including the gas burners, venting, and pressure valves—is inspected safely by a certified technician.
The Modern Upgrade: Tankless Water Heaters
In recent years, many homeowners have ditched the bulky storage tanks in favor of tankless systems. These compact units mount to the wall and use high-powered gas burners or electric coils to heat water instantly as it flows through a heat exchanger.
Lifespan Advantages
Because they do not store water, tankless systems are not subjected to the constant corrosive pressure that destroys traditional tanks. As a result, a well-maintained tankless system can last 20 years or more—nearly double the lifespan of a standard tank.
The Necessity of Tankless Hot Water Heater Maintenance
However, that long lifespan comes with a major caveat: tankless hot water heater maintenance is absolutely mandatory.
Because a tankless unit heats water extremely rapidly, hard water scale builds up on the narrow heat exchanger coils incredibly fast. If this scale is not removed, it restricts water flow, reduces efficiency, and eventually causes the system’s sensors to overheat and burn out the unit.
To maintain a tankless system, it must be flushed annually with a specialized descaling solution (often food-grade white vinegar). This requires isolating the unit, attaching a submersible pump, and circulating the acid through the heat exchanger for 45 to 60 minutes to dissolve the mineral buildup.
If your home has particularly hard water, installing a water softener in front of the tankless unit is highly recommended to protect your investment.

Water tank vs. Tankless systems: there are pros and cons to each system.
The Unsung Hero of the Basement: The Sump Pump
While your water heater provides daily comfort, your sump pump is the final line of defense protecting your home from catastrophic water damage.
If you live in an area with a high water table, heavy spring melts, or a house positioned at the bottom of a slope, groundwater naturally accumulates around your foundation. The sump pump sits in a pit (the basin) cut into your basement floor. As water fills the pit, a float switch rises, triggering the pump to activate and forcefully eject the water away from your home through a discharge pipe.
The Lifespan of a Sump Pump
Unlike water heaters, sump pumps have highly variable lifespans. On average, a standard submersible sump pump will last 7 to 10 years.
However, lifespan is directly tied to workload. A pump in a dry climate that only kicks on during rare, torrential downpours might last 15 years. A pump in a low-lying, wet climate that runs multiple times a day might burn out its motor in just 5 years.
Critical Sump Pump Maintenance
A sump pump failure is uniquely devastating because you usually only discover it has broken during a massive storm—exactly when you need it most. By the time you realize it isn’t working, your basement is already flooded.
This is why proactive sump pump maintenance is non-negotiable. It takes less than 15 minutes a year and can save you tens of thousands of dollars in restoration costs.

A simple maintenance checklist can help ensure your sump pump is ready for storm season.
Essential Maintenance Checklist:
- The Water Test (Quarterly): Do not wait for a storm to see if your pump works. Fill a large bucket with water and slowly pour it into the sump pit. Watch the float switch rise. The pump should kick on automatically, drain the water quickly, and shut itself off.
- Clean the Debris (Annually): The sump pit naturally collects dirt, gravel, and sludge. Over time, this debris can get sucked into the pump’s intake screen, clogging the impeller and burning out the motor. Unplug the pump, pull it out of the pit, and clean the intake grate thoroughly. Use a wet/dry vacuum to suck the mud and rocks out of the bottom of the basin before placing the pump back in.
- Check the Discharge Line (Seasonally): Ensure the pipe carrying water outside is clear. In the winter, make sure the end of the pipe isn’t buried under snow or frozen solid, as this will cause the pump to run continuously without moving any water, eventually burning out.
- Test the Backup System: If your home loses power during a severe storm, your primary sump pump is useless. Every home with a finished basement should have a battery backup sump pump installed. Test this backup system annually by unplugging the main pump and raising the float switch to ensure the battery successfully takes over. Replace the marine battery every 3 to 5 years.
Conclusion: Prevention is Cheaper than the Cure
Your home’s plumbing systems work tirelessly behind the scenes, but they are not invincible. Every appliance has a finite lifespan, and neglecting them is a guaranteed way to accelerate their demise.
By understanding the average water heater life expectancy, you can budget for a replacement before you are forced into an emergency installation. By committing to annual water heater maintenance, whether through a DIY flush or hiring a professional for comprehensive servicing water heater checks, you protect your investment. And by treating sump pump maintenance as a mandatory seasonal chore, you guarantee your basement remains dry when the heavy rains finally come.
Take a walk through your utility room today. Check the dates on your equipment, test your pump, and schedule that maintenance flush. Your future self—and your wallet—will thank you.
PEX vs. Copper: Choosing Your Replacement Material
When undertaking a poly b pipe replacement, you will need to choose what material replaces it. Today, there are two standard options: Copper and PEX (Cross-linked polyethylene).
Copper is the traditional standard. It is incredibly durable, lasts for 50 to 100 years, and is resistant to bacteria. However, it is rigid, requires soldering, and the raw material is highly expensive. Choosing copper will push your poly b plumbing replacement cost to the absolute maximum.
PEX is the modern standard and the overwhelming choice for residential repipes today. Unlike Poly B, PEX is highly resistant to chlorine and chemical breakdown. It is flexible, meaning it can be installed in long, continuous runs with fewer joints (which means fewer potential leak points). It expands rather than bursts if water freezes inside it. Best of all, PEX is significantly cheaper than copper, making the overall cost of replacing polybutylene pipes much more manageable.
Conclusion: Proactive Action is the Only Option
Living with polybutylene plumbing is a gamble where the house always wins. The pipes are degrading silently, and the financial consequences of a sudden rupture far exceed the poly b plumbing replacement cost. Between water mitigation, mold removal, replacing ruined drywall and flooring, and the potential denial of insurance coverage, a reactionary fix is always a nightmare.
If your home contains poly b plumbing, the best time to replace it was yesterday. The second best time is today. By taking a proactive approach, you control the timeline, you protect your property’s value, and most importantly, you buy yourself peace of mind knowing that the hidden danger in your walls is finally gone.